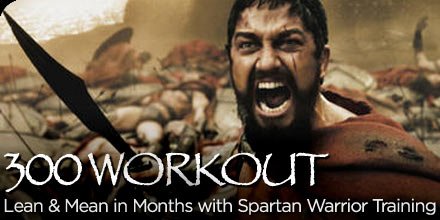
 | As soon as the '300' movie came out, the '300' workout came out. Men and women everywhere were eager to learn how King Leonidas and his Spartan warriors got their abs of steel, etc... Here is what they did! |
By: Jaime Filer
| Article Summary: |
![]()
300 Workout![]()
As soon as the "300" movie came out, the "300" workout came out. Men and women everywhere, from all walks of life, were eager to learn how King Leonidas (Gerard Butler) and his Spartan warriors got their abs of steel, boulder shoulders, barn door backs, etc.

Gerard Butler in "300."
© 2007 Warner Bros. Pictures.
The truth is, the training regimen was the brainchild of the mens' trainer, Mark Twight. Because of his workout training plans, many of the men went from being around 40 pounds overweight to being lean, mean, fighting machines in a matter of months. Others just improved their level of fitness and conditioning exponentially.
The workout is done in a giant-set fashion. That is to say, you go from one exercise, to the next, to the next, with little to no rest in between. However, if you cannot complete the desired number of reps for each exercise, you are permitted to rest/pause, until you complete all reps before moving on to the next station.

Vincent Regan And Gerard Butler In "300."
© 2007 Warner Bros. Pictures.
* It should be noted that this routine was not used everyday by the men in the film, and should not be used everyday by recreational exercisers. Remember, this workout isn't for beginners. The demands on the muscles are high, and you risk injury. So make sure you know what you're doing before you attempt to become a Spartan.
 View The 300 Official Website Here.
![]()
The 300 Workout![]()
For a total of 300 reps
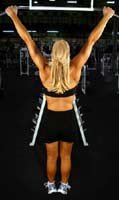
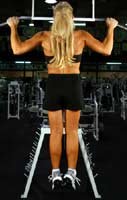
Pullups
Exercise Data
Main Muscle Worked: Lats
Other Muscles Worked: Biceps, Middle Back
Equipment: BodyOnly
Mechanics Type: Compound
 |  |
| Exercise Data Main Muscle Worked: Quadriceps Other Muscles Worked: Hamstrings, Calves, Glutes Equipment: Barbell Mechanics Type: Compound |
 |  |
What NOT To Do:
 |  |
Tips: Think of a deadlift as a squat, only the bar is in your hands rather than on your back.
The Stance: Approach the loaded barbell and assume a stance about as wide as your own shoulders while gripping the bar such that the inner aspects of your arms are slightly outside of your thighs. Another way to determine your optimal deadlift foot placement is to jump down from a box which is half your own height and "stick" the landing. Now look at your feet...this will approximate your ideal stance width and degree of foot turn-out.
Feet and Shin Position: Feet should point straight forward or turned out to a 25 degree angle at most. The best foot angle is one which provides the least amount of hip and knee restriction when you lower the hips in preparation to lift, so don't be afraid to experiment a bit. The shins should be two to three inches from the bar and then when you actually bend down and lower your hips in preparation to lift, the shins will touch the bar. Most of the weight will be on the heels of the feet. This facilitates maximal contribution of the glutes and hamstrings. During the ascent, the bar will travel as close to the leg and shins as possible. Ideally, wear cotton sweat pants or track pants with long socks to protect your shins.
Hand Position: A "reverse grip" should be used when deadlifting. This means that one hand will be supinated (palm faces you) and the other pronated (palm facing away). This will help keep the bar in your hand. If grip strength is not one of your training targets, feel free to use wrist straps with a conventional grip. Hold the bar high up on the palm to compensate for any roll of the bar when pulling the weight up. Generally, the grip should start with the index finger and the little finger bordering the knurling in the middle of the bar.
Head Placement and Eye Contact: The entire spine should remain neutral, which means you look neither up nor down, but instead, the head follows the body, almost like you're wearing a cervical cast on your neck. It's OK for the head to be SLIGHTLY up (this tends to improve muscular contraction of the low back muscles) but in all cases, the lift must start with the hips down, the entire spine neutral, and the feet flat on the floor.
The Ascent: As you stand up with the weight, imagine pushing the earth away from you with your feet. When viewed from the side, your hips and shoulders should ascend together; if the hips rise before the shoulders, it means you're using your back rather than your legs. If this happens, reduce the weight until you can perform the lift correctly and add more specific quad-strengthening exercises to your program.
The Lockout: Competitive powerlifters are required to demonstrate control over the weight by standing up and then extending the hips forward in an exaggerated manner. If you're NOT a competitive lifter, simply stand up with the weight without this exaggerated maneuver.
The Descent: Simply return the bar to the floor, under control, by reversing the technique you used to lift the weight.
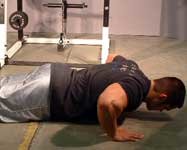
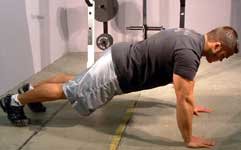
Learn More About This Exercise:| Exercise Data Main Muscle Worked: Chest Other Muscles Worked: Triceps, Shoulders Equipment: BodyOnly Mechanics Type: Compound |
 |  |
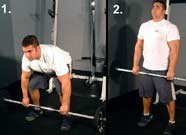
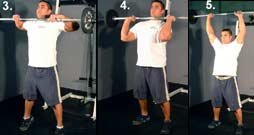
| Exercise Data Main Muscle Worked: Shoulders Other Muscles Worked: Triceps, Biceps, Lower Back, Traps, Hamstrings, Calves, Abdominals, Shoulders, Glutes Equipment: Barbell Mechanics Type: Compound |
 |  |
Tips:
Beginning Position
• Assume a shoulder-width stance, knees inside arms.
• Position feet flat on floor.
• Grasp bar with a closed, pronated grip.
• Grip should be slightly wider than shoulder-width.
• Squat down next to bar, heels on floor.
• Fully extend arms.
• Point elbows out to sides.
• Position bar over the balls of the feet; bar should be close to shins.
• Position shoulders over or slightly ahead of the bar. Establish a flat back posture.
Upward Movement Phase: First Pull
• Begin pull by extending the knees.
• Move hips forward and raise shoulders at the same rate.
• Keep the angle of the back constant.
• Lift bar straight up.
• Keep bar close to the body, heels on the floor.
• Keep elbows fully extended.
• Keep shoulders back and above or slightly in front of the bar.
• Keep head facing straight forward.
• Maintain torso position.
Upward Movement Phase: Transition (Scoop)
• Thrust hips forward and continue pulling until the knees are under the bar.
• Keep feet flat.
• Torso should be nearly vertical and erect.
• Keep shoulders positioned directly over the bar.
• Keep elbows fully extended.
Upward Movement Phase: Second Pull
• Brush bar against the middle or top of thighs.
• Keep torso erect and head facing straight or slightly up.
• Keep elbows straight.
• Move bar explosively by extending the knee, hip, and ankle joints in a "jumping action."
• Keep shoulders over the bar as long as possible, and elbows out.
• Keep bar close to body.
• At maximum plantar flexion, shrug the shoulders.
• At maximum shoulder elevation, flex and pull with the arms
• Keep elbows high during pull; keep them over the wrists.
• Pull bar as high as possible.
Catch
• Rotate elbows around and under the bar.
• Hyperextend the wrists as the elbows move under the bar.
• Point elbows forward or slightly up.
• Rack the bar across the front of the shoulders.
• Keep torso erect.
• Flex hips and knees to absorb the weight of the bar.
Overhead Press
• Without moving your feet, press the bar overhead.
• The barbell is to be pressed evenly in a continuous movement to arms length overhead.
• During the Press, the trunk may be inclined backwards to any extent, but the legs must remain braced and there must be no movement of the feet.
Downward Movement Phase
• Lower bar slowly and under control to top of thighs.
• Flex hips and knees as bar lands on thighs.
• Squat down toward floor.
• Maintain erect torso position.
• Keep bar close to shins.
• Place bar on the floor.
• Inhale before the first pull of the first repetition.
• Hold breath until second pull.
• Exhale through the sticking point (shrug) of the second pull.
• Inhale during the downward movement phase of succeeding repetitions.
source: bodybuilding.com

1 comment:
Some advanced elliptical Cross trainer units also have exercise programs that guide you through exercises. This can be helpful to assist you in doing exercise programs built into the machine so that you do not have to become bored.
Post a Comment